Hi everyone as I mentioned in my blog post last Thursday (you can view it
here) I'm starting a University Series which includes six videos! This is the first video in the series, which you can watch here, or on our
Youtube Channel. For each of the videos I'll be doing in depth blog posts which include all of the information that I mention in the Video so you don't miss a thing! Now on with today's post.
What To Bring To University
As I mention in the video I like to organize things by room / section to make it easier when planning what to pack. This video is also geared more to people who are moving into Residence rather than moving into your own apartment.
*As a side note, before you begin packing you need to make sure that you've contacted your Residence to find out what you can and cannot bring with you. They will most likely be sending out a list of things that you should be bringing with you (this is usually pretty detailed), so this is a supplement to that list.
Bathroom
Toothbrush and Toothpaste
Hairbrush
Elastics / Bobby pins / Headbands
Shampoo / Conditioner / Body Wash / Soap
Painkillers / Cold Medicine *
Shower Caddy **
Makeup
Hair Products
* Being in school and living in Res, you will get sick and have headaches. It's really important that you come prepared ahead of time because when you're already sick you don't want to be going out to the shop to get these things.
** If you don't live in an apartment style in Res where you have your own shower, you'll be needing one of these. It's great to put all of your shower things in it so when you're going to shower to don't have to carry everything in your arms. You can pick these up at the dollar store.
Kitchen*
Cups / Mugs / Water Bottle
Pot / Pan / Toaster / Kettle
Bowls / Plates**
Cutlery / Cooking Utensils
Snacks***
*If you are living in a non apartment style, you won't be needing to bring a whole lot of kitchen equipment as each floor will have it's own kitchen with equipment.
**Only bring a set of two, as most of the time it will only be you eating, you don't need them taking up a lot of room.
***These are great to keep in your room for when you're studying and need a quick snack or if you're heading out the door for class.
School Supplies*
Notebook / Binder / Laptop
Pens / Markers / Highlighters / Pencils
Printer / Printer Paper / Flash Cards
*This is just a basic list of things you'll need. I would wait to get a whole bunch of things as during the first week your professors will tell you what exactly you'll be needing for that course
Bedroom
Two sets of bedding*
Mattress Pad**
Two Pillows
Duvet
Throw Blankets***
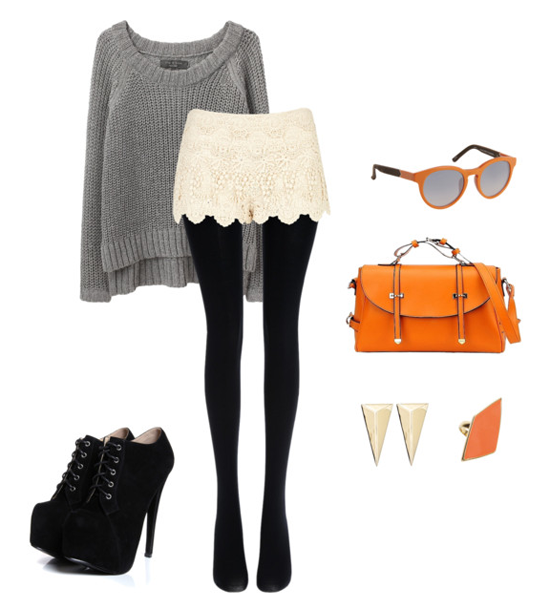
Clothing Seasonal****
Decorations*****
Desk Lamp and Chair ******
Plant
Books (a few of your favourites)
Movies (a few of your favourites)
Slippers
*You'll want to have an extra set of bedding so that you can put the new one on while you wash your old sheets.
**The mattresses they provide in Res are really uncomfortable. I would bring a mattress pad or an egg crate so that you can get the best possible sleep.
***The rooms are extreme temperatures so I would bring throw blankets so you can layer up while you're sleeping.
****Don't bring all of your clothing with you when you go. You don't have a whole lot of storage space in your room. I would bring that season's clothing and then before the seasons change you can rotate out some of your clothing.
*****The rooms in Res are all generic and prison like, so I would bring as much decorations as you can. You'll be spending eight months in the room and you want it to feel like home. I would bring posters, photographs of family and friends, christmas lights and any other small decorations.
******The desk lamp and chair they provide really aren't the greatest when you're studying. I would bring your own (you can pick up cheap ones at Ikea and Walmart) to make sure you have the best possible study area.
Random
Kleenex*
Fabreze**
Cleaning Supplies***
Chargers
Extension Cords****
*As I said earlier, you will be getting sick, so having some on hand will help.
**These rooms can get very stuffy, so having some Fabreze to freshen up the room will help with that. Normally I would suggest some candles, but all Residences will have an no flame policy. However, you can get some flameless candles to bring with you.
***Only bring a few things with you, as each floor will most likely have their own cleaning supplies.
****These are a must, and a life saver. You'll have tones of things to plug into, and sometimes the outlets are in awkward places. I picked up two from Ikea for $4 two years ago and they still work great.
I hope that this list has helped all of you get ready for when you're going off to school. As I said earlier, this is just a supplement list to the one your Residence will provide for you. If you have any suggestions of what to bring, leave your ideas down below! Don't forget to keep your eyes pealed for video two, which I'll be putting up tomorrow! Have a wonderful day and happy packing!
-xx Sally